Newborn Skin Retouching: What to Fix In-House and What to Outsource

Why Newborn Skin Retouching Is Its Own Discipline
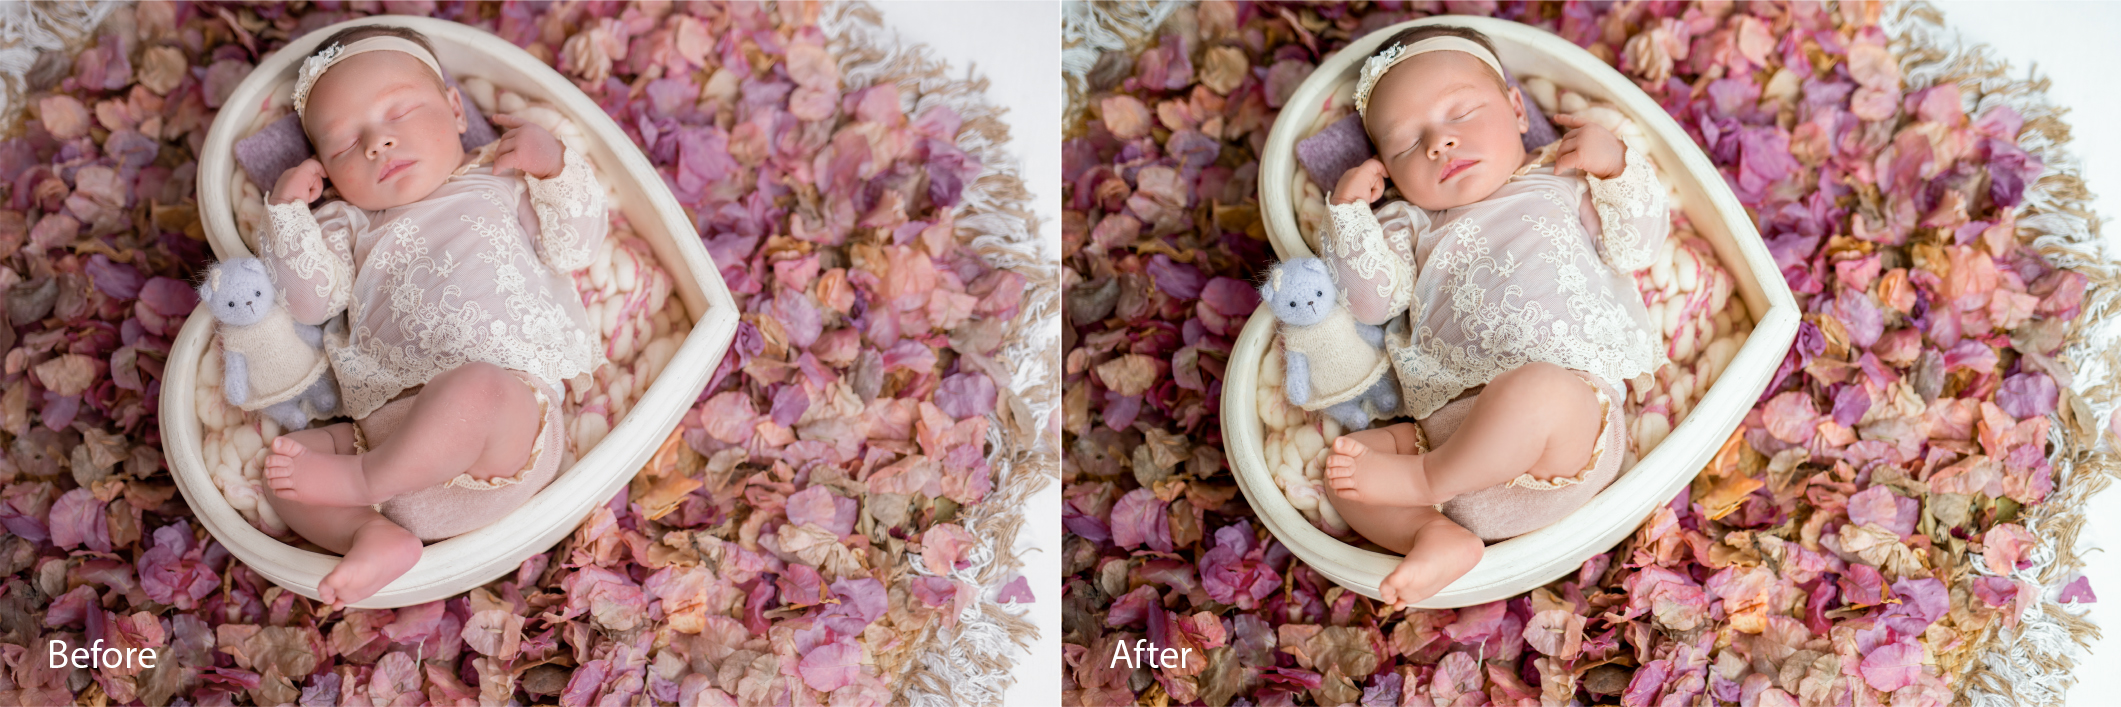
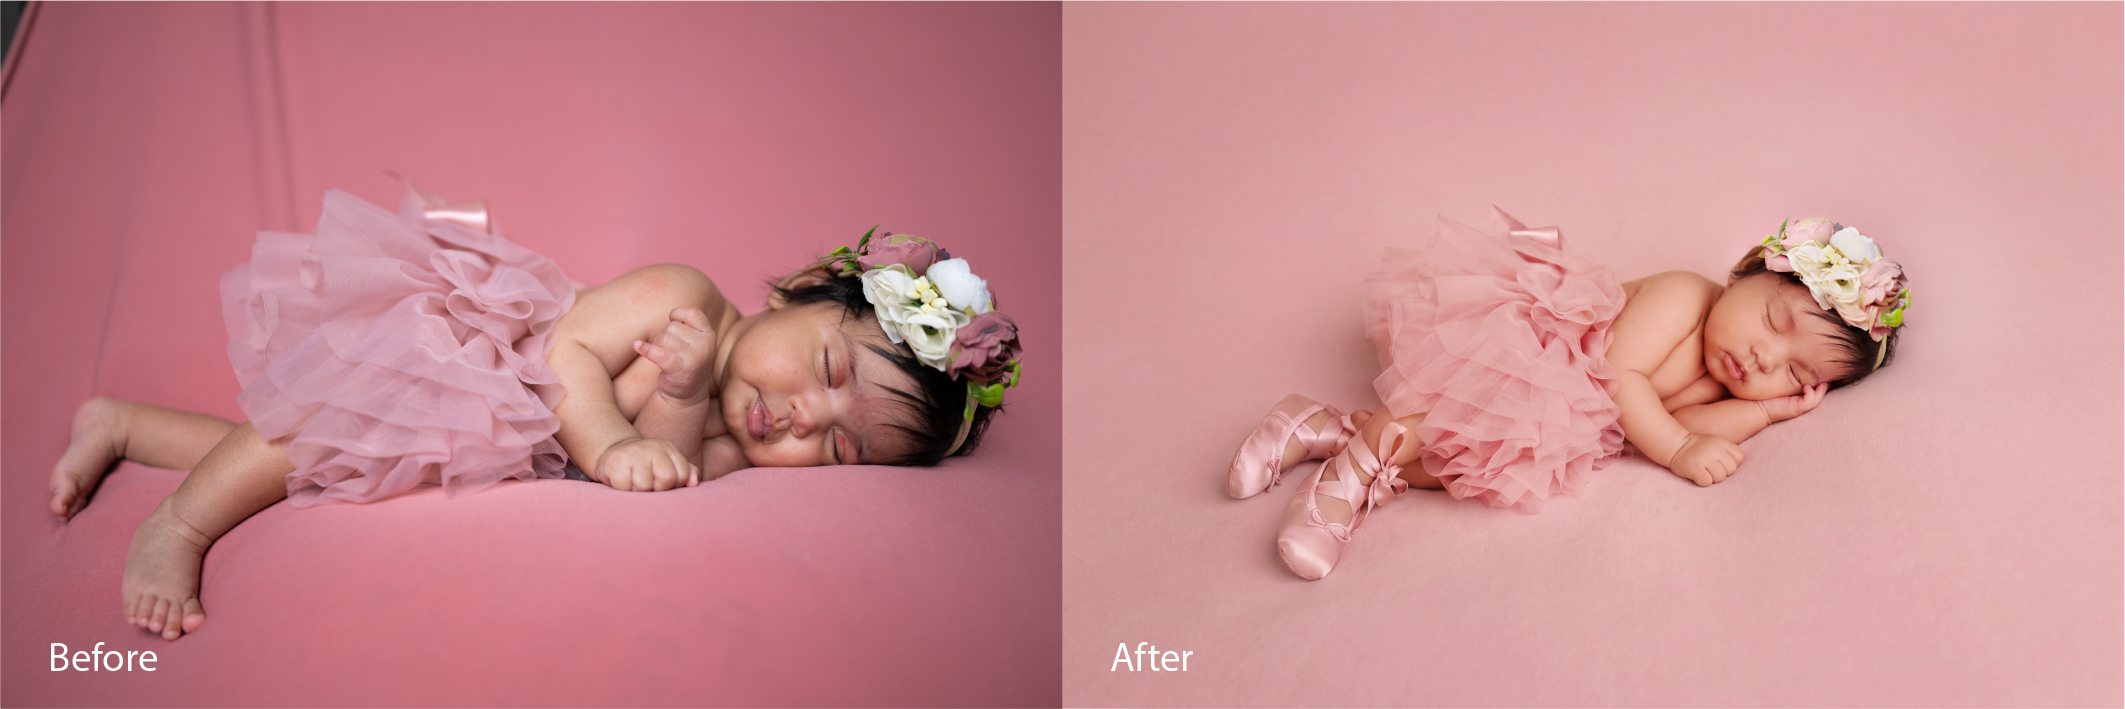
Newborn skin peels, blushes, and breaks out — and somehow it still needs to look natural in print. It's the most common thing photographers tell us when they first reach out about their newborn work: standard retouching skills don't transfer cleanly here, and the results show it.
This is not beauty retouching, but smaller. Not even close.
Newborn skin behaves differently from any other subject. Baby acne, milia, mild jaundice, peeling at the wrists and ankles, and the physical marks of a very recent arrival — these all require a specific approach. And the goal isn't to erase any of it. Parents don't want their baby airbrushed. They want to remember exactly how that baby looked.
Quick answer: The best newborn retouching makes parents say "that's exactly how I remember them" — not "they looked so perfect." Restraint is the skill.
The 4 Core Challenges (And How to Handle Each One)
Before you touch a slider, know what you're actually dealing with. Here's a breakdown we put together of the four challenges that come up in virtually every newborn session we work on:
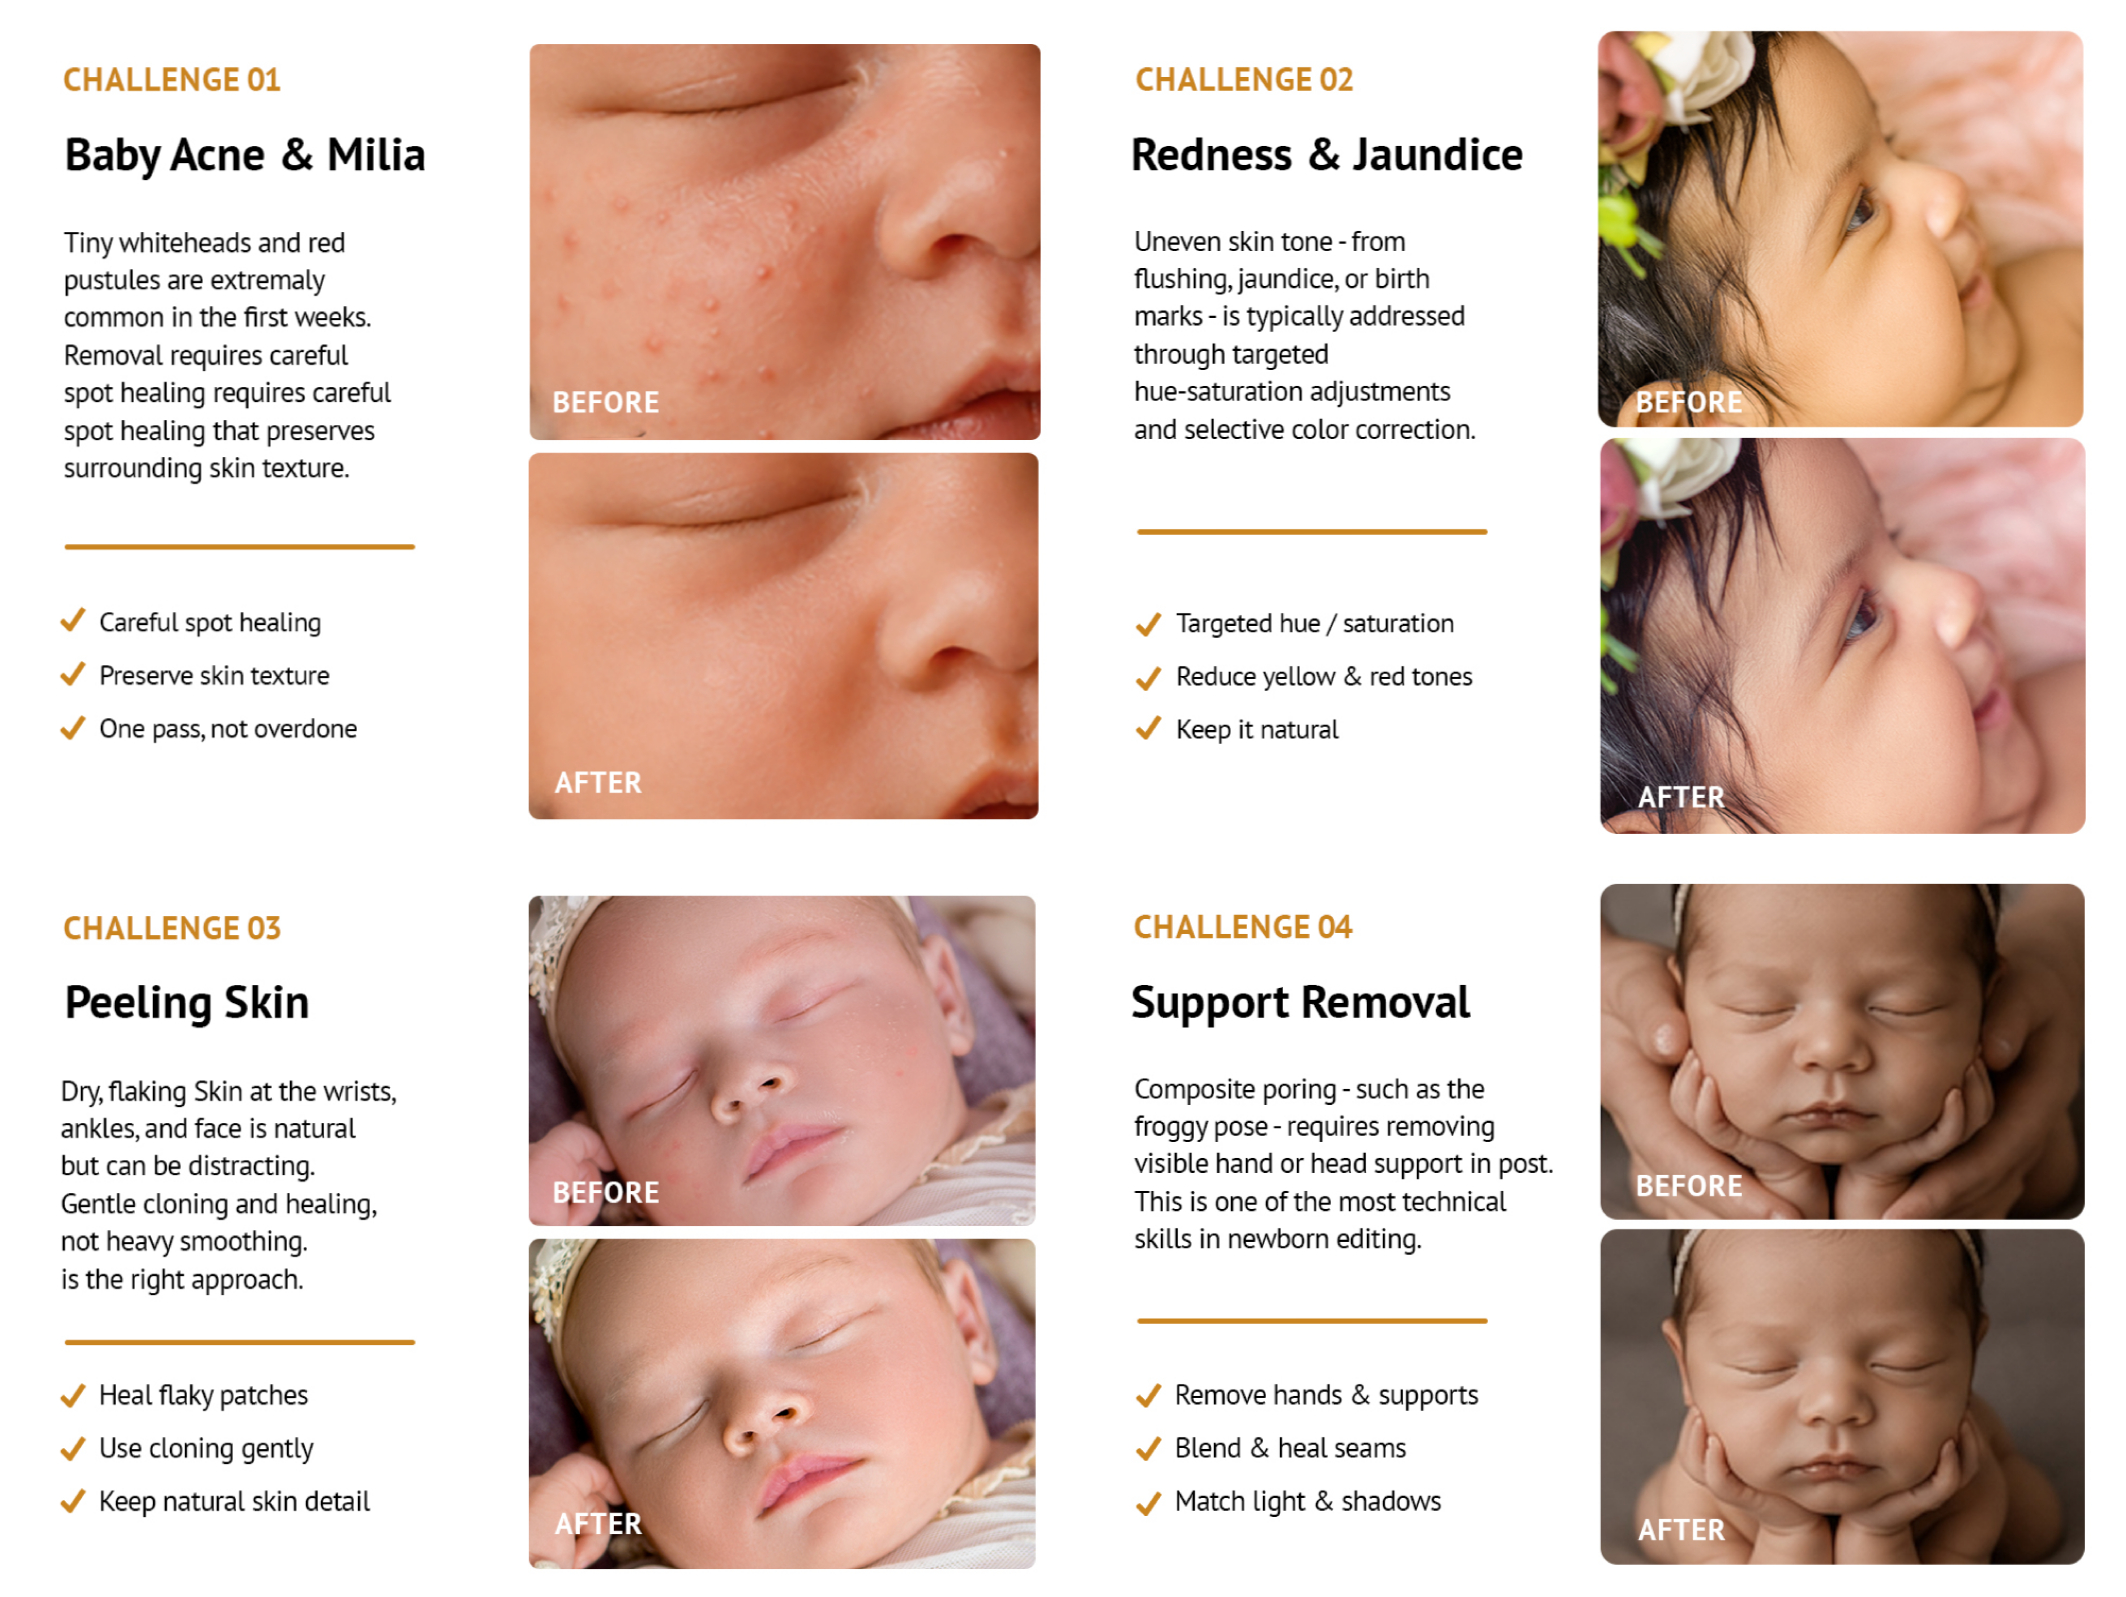
Four challenges every newborn retoucher will encounter — and the right approach to each.
Baby acne and milia appear as small red or white bumps on the cheeks, nose, and forehead. They're extremely common in the first weeks of life. When we see these in a file, we reach for the healing brush — one careful pass, preserving the surrounding skin texture. The mistake is going back over the same spot repeatedly, which creates a flat, patchy look that reads as obviously edited.

One careful pass over baby acne and milia — the skin still reads as real because the texture underneath was preserved.
Look at the skin surrounding the treated area — it still has pores, warmth, and dimension. That texture is what makes the result believable. The moment it disappears, the edit announces itself. Both images above are from our studio.
When we see redness and jaundice in a file, we reach for targeted hue-saturation adjustments, not global color shifts.
Reducing yellow or red selectively in the skin tones gives a natural result. A global temperature shift fixes the skin but throws off your backgrounds, props, and wraps
Targeted correction on redness — the skin detail stays intact while the uneven tone is calmed.
Peeling skin at the wrists, ankles, and around the face responds to gentle cloning, not heavy smoothing. Preserve the detail around each flaky patch. You're reducing visual distraction, not producing porcelain skin.
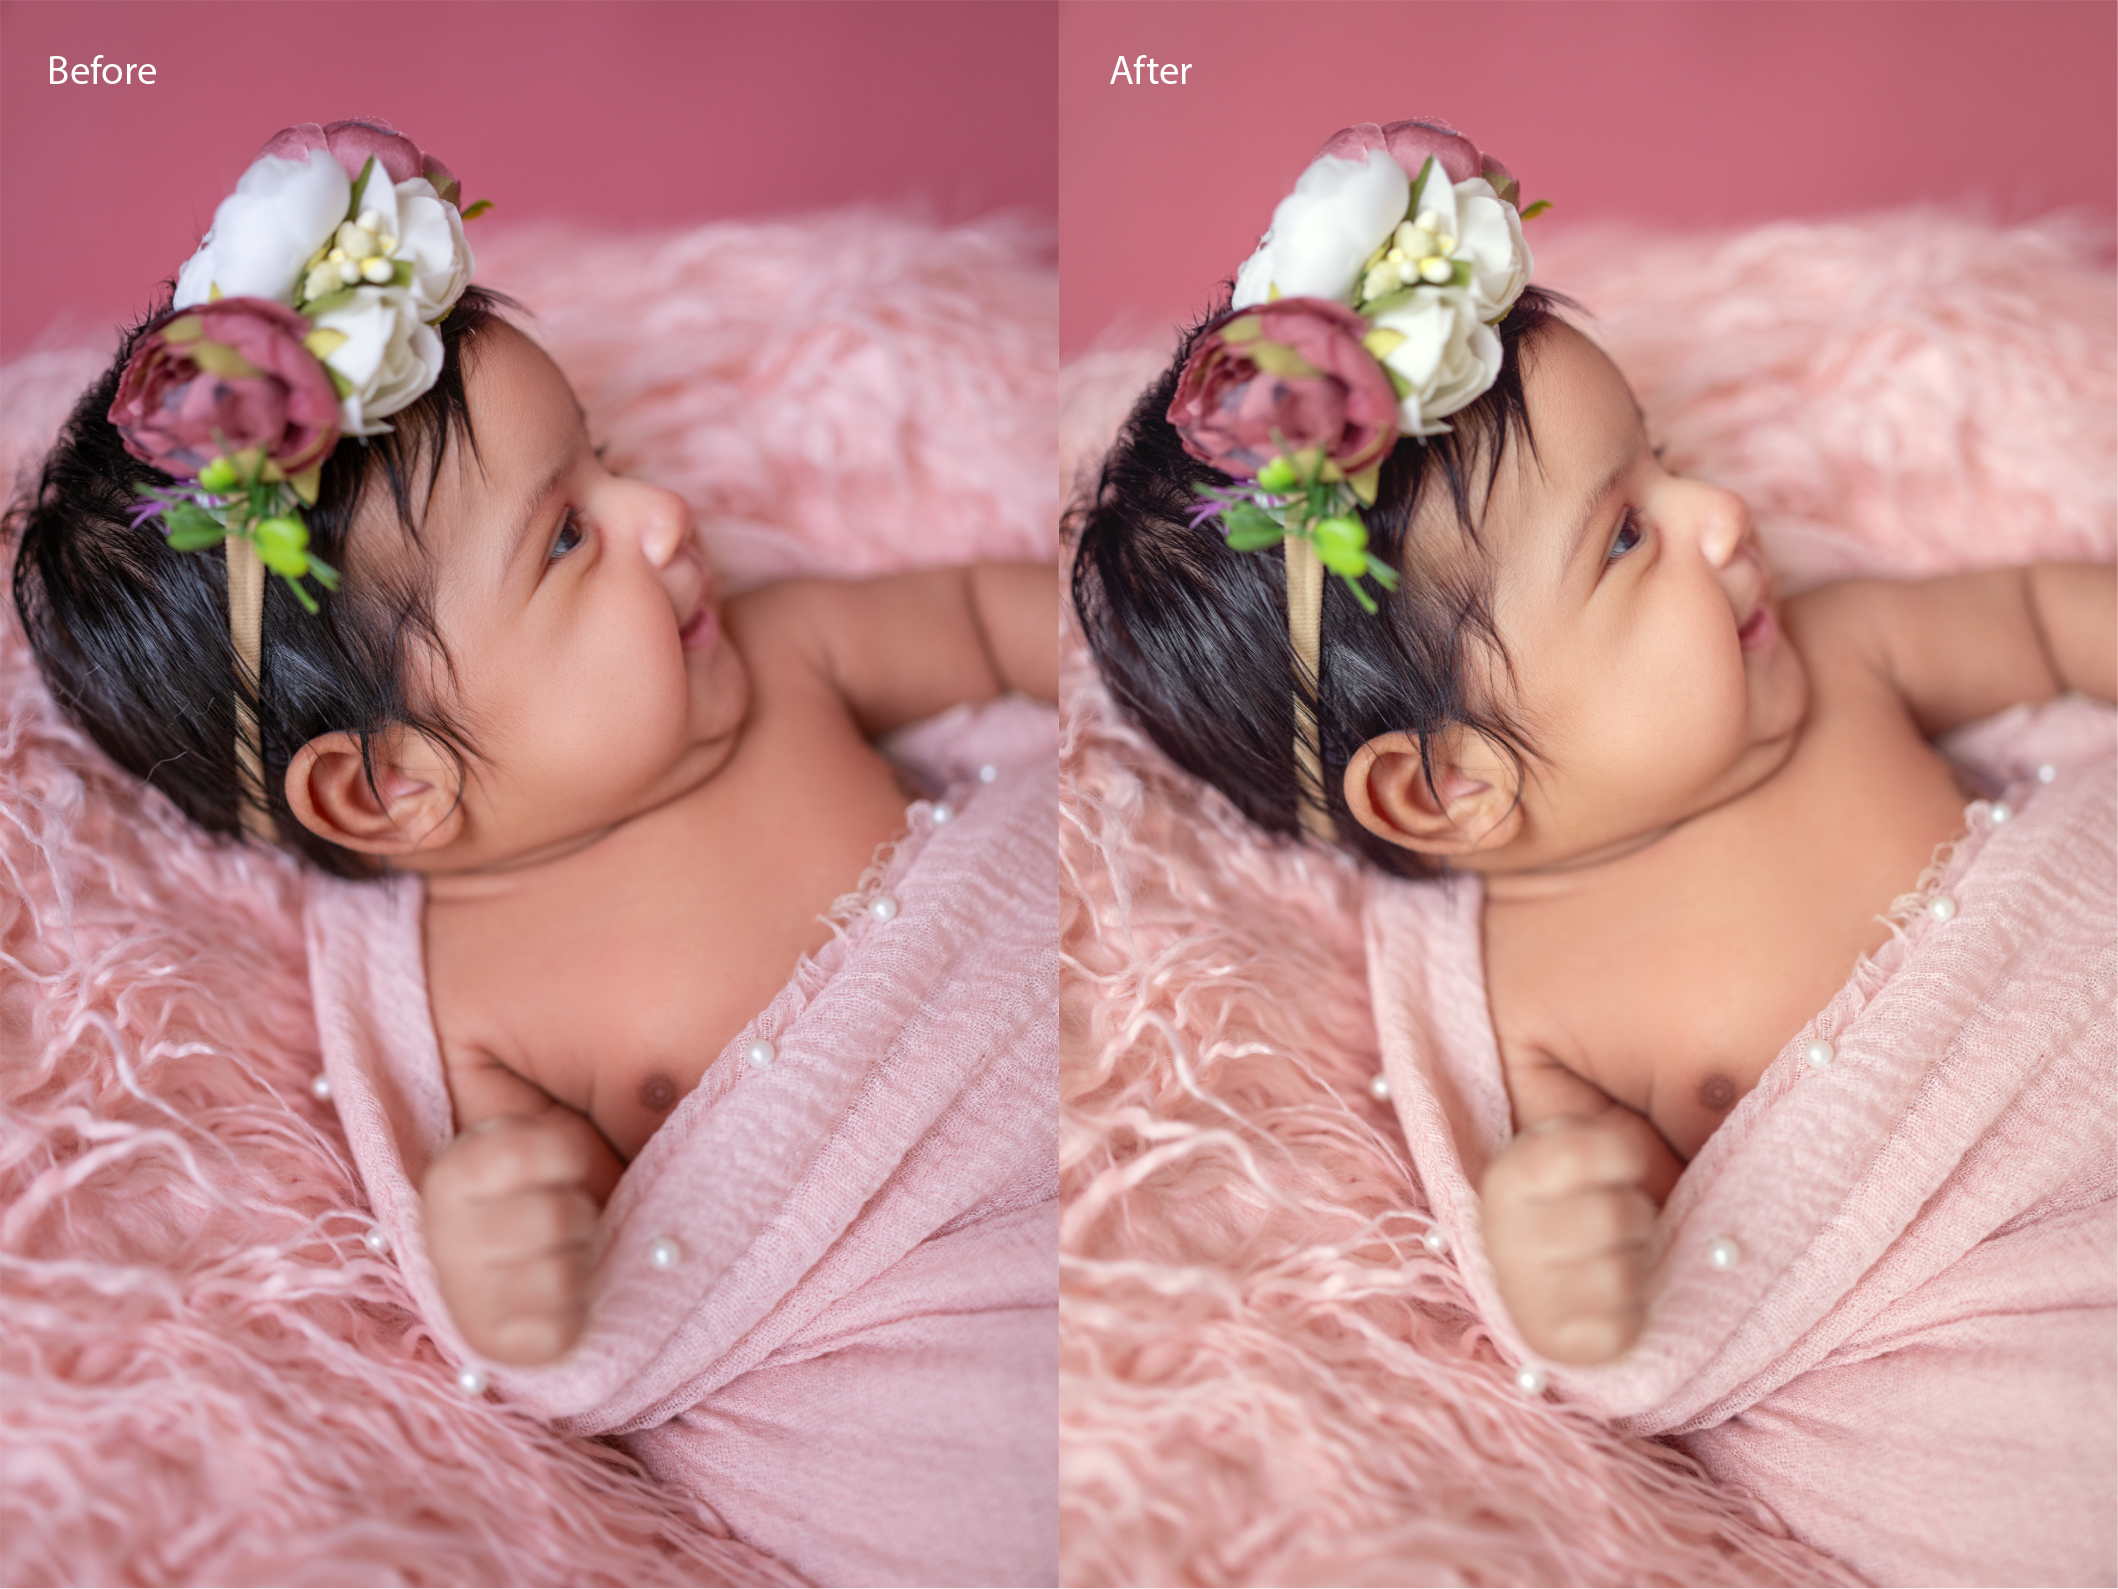
Support removal is the step we spend the most time on and the one most often underestimated. Composite poses like the froggy pose require removing a parent's hands from the frame entirely in post — which means all layer work must happen before any skin retouching begins. You cannot retouch across a layer boundary that doesn't yet exist.
A Practical Newborn Retouching Workflow
Here's the part most tutorials skip: sequence matters more than technique. Editing in the wrong order creates rework and inconsistency.
Step 1 — Global corrections first
Start in Lightroom or Capture One. Get your white balance, exposure, and base color right before moving into Photoshop. Use the whites of your wraps and props as your neutral reference. Spending five minutes here saves thirty minutes on skin tone work later.
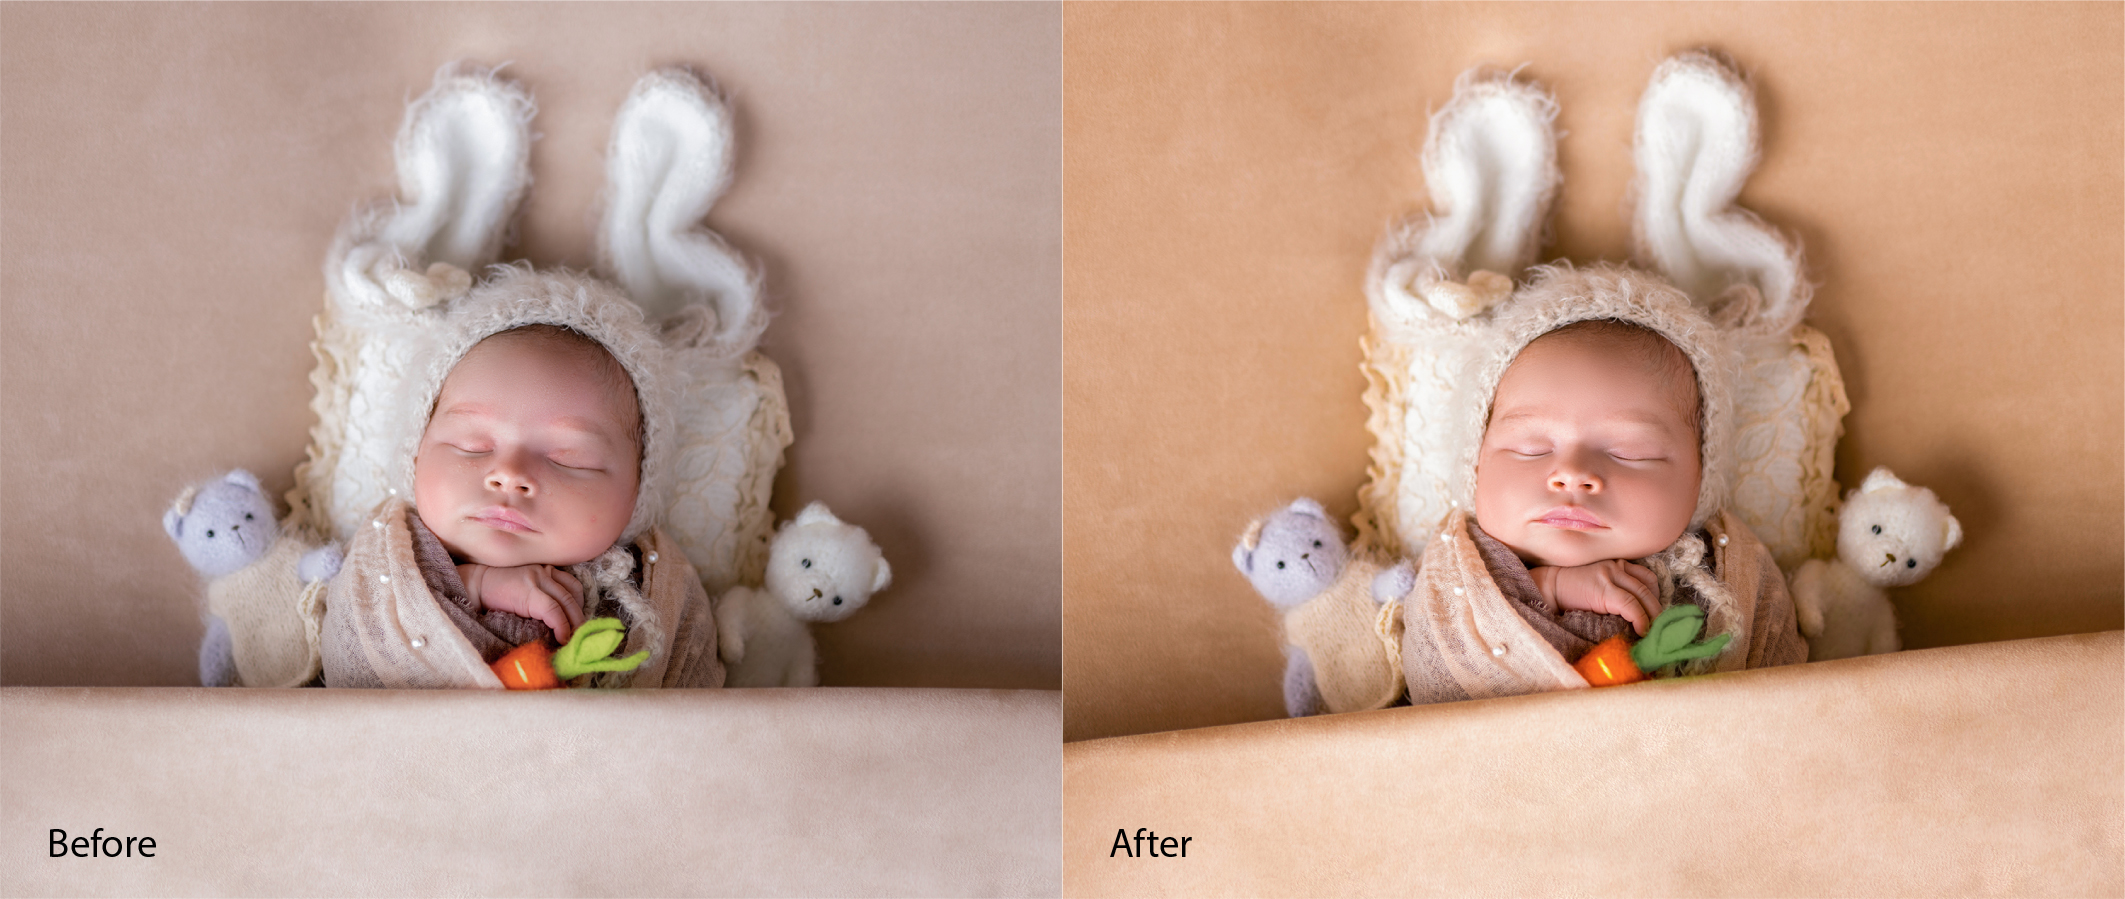
Correcting a pale, flat starting file in Lightroom — white balance and exposure work brings the skin tones to life before any detailed retouching begins. This is a BeautyRetouching.net project.
Step 2 — Composite work before skin work
Any composite posing — froggy pose, chin-on-hands, or anything requiring hand removal — gets done first. We merge and flatten composite layers on a dedicated layer before touching the skin. This is non-negotiable — in our workflow it never moves.
Step 3 — Spot healing
We work through baby acne, milia, scratches, and visible peeling methodically — healing brush and clone stamp, sample sources kept close in tone and texture to the surrounding skin. One pass. The urge to go back over the same spot is where over-processing starts, and we don't go there.
Step 4 — Skin tone evening
Hue-saturation adjustment layers with luminosity masks are our go-to for calming uneven redness or jaundice. For jaundice specifically, we target a reduction of yellow in the skin tones rather than making a global shift — it's more natural and doesn't throw off everything else in the frame. Color balance adjustments in the shadows can also neutralize the greenish cast that sometimes appears after jaundice correction.
Skin tone evening: the background and wrap tones also clean up as a natural by-product of getting the skin right.
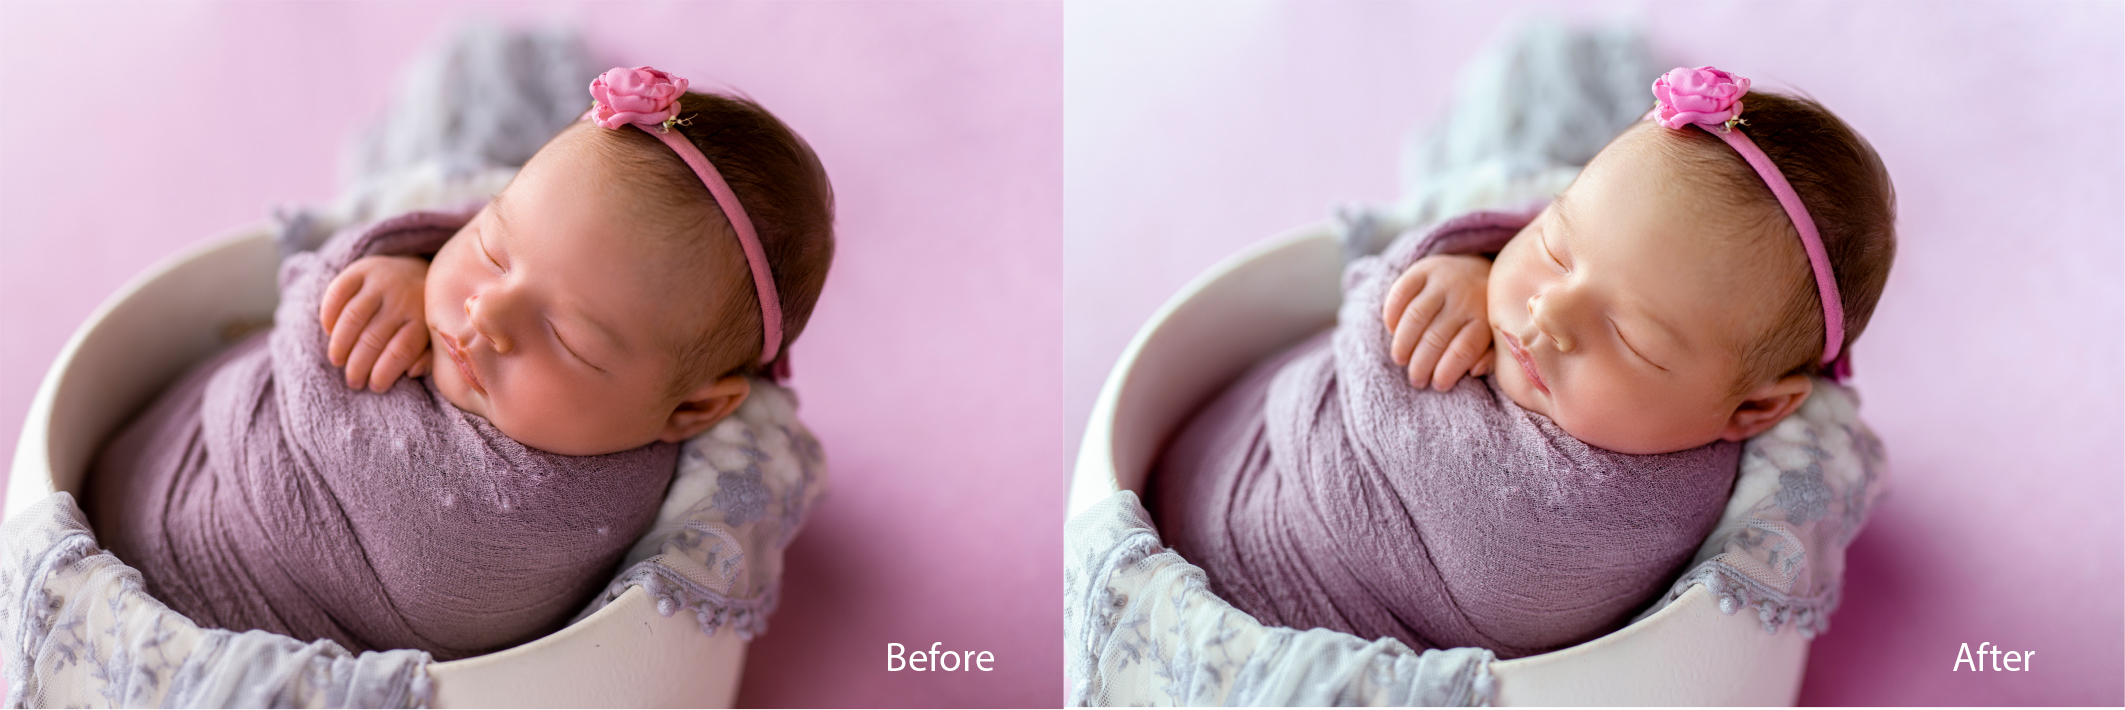
Step 5 — Dodge and burn
Opacity stays extremely low in this step — 3 to 5% is often all we need. The goal is soft dimensionality, not sculpting. This is what gives fine art newborn portraits their glow without looking lit from inside, and it's one of those steps where less is genuinely more.
A gentle dodge and burn pass — the light feels three-dimensional without changing what the baby actually looked like.
Step 6 — Final color grade
The grade goes on consistently across the whole gallery — and it should always be the photographer's, not ours. Soft and airy, warm and creamy, moody and dark — whatever the signature style, it needs to hold from image one to image sixty. Save it as a Lightroom preset or Photoshop action so nothing drifts.
Final grade applied: skin tones, background, and overall mood all read as one cohesive image. This is one of ours — the kind of consistency we deliver across a full session gallery.
The Golden Rule: Restraint
Here's the catch — and it matters. The most common newborn retouching mistake isn't doing too little. It's doing too much.
Over-smoothed skin doesn't look beautiful. It looks alarming. A baby who appears to have had a professional facial is not the memory parents are trying to preserve. One careful pass over problem areas, a subtle dodge and burn, and a consistent grade is usually all you need.
Don't let this trip you up: the temptation to "just fix one more thing" is where good retouching goes wrong. In our workflow, we call it done after one pass and come back with fresh eyes before export. That pause catches more than a second round of editing ever does.
Should You Outsource Newborn Photo Editing?
For photographers shooting multiple newborn sessions per week, editing quickly becomes the ceiling on growth. A full session with about 50 to 80 final images can take three to six hours to retouch properly. That time comes from somewhere.
The question photographers ask us isn't whether outsourcing is a good idea. It's whether the right partner exists.
A retouching partner that genuinely understands your aesthetic, your composite requirements, and the specific challenges of baby skin editing is not a cost — it's a business investment. We know this niche specifically. The time you reclaim goes back into shooting, client relationships, and the parts of photography that drew you to it in the first place.
That shift — from editing bottleneck to shooting more — is what we hear from photographers who outsource with us most often.
When evaluating a retouching partner, ask for before-and-afters across a range of skin tones. Ask how they handle baby acne versus peeling skin. Ask what their process is when a composite needs to be redone. The answers tell you whether they genuinely understand this niche — or are applying generic retouching skills to a specialized problem.
At BeautyRetouching.net, newborn photo editing is one of our specialist services — natural-looking results, reliable turnaround, and a workflow built around your style from day one. Get in touch to discuss your studio's needs →
FAQ: Newborn Skin Retouching
How much retouching should newborn photos have?
Less than you might expect — and less than most photographers assume when they send us their first newborn gallery. The goal is to reduce visual distractions — baby acne, redness, peeling skin — while keeping the result looking real and warm. One careful pass is usually enough. Heavy smoothing is the most common mistake we see in this niche.
Can you remove baby acne in Lightroom?
In our workflow, we use Lightroom's healing tool for isolated spots — but for anything more involved, like clusters of acne or milia close to delicate areas, we move into Photoshop. The healing brush and clone stamp give a level of control Lightroom can't match when skin texture preservation matters.
How long does newborn photo retouching take?
In our studio, a full newborn session — typically 50 to 80 final images — takes around three to six hours of careful retouching. That's the main reason photographers with a growing client load send their newborn work to us rather than handle it in-house.
Is it ethical to retouch newborn photos?
Yes and it's something we think about carefully with every session we work on. Calming baby acne, evening redness and jaundice, and removing support hands from composite poses are all standard in our work. The line, as we see it, sits at altering a baby's features or removing birthmarks that carry personal significance. We don't cross it — and we'd push back if asked to.
What's the difference between newborn retouching and standard portrait retouching?
More than most photographers expect when they first send us newborn work. The goals, tools, and ethics are all different — newborn retouching uses a lighter touch, avoids smoothing skin texture, and works around a specific set of skin conditions that simply don't appear in adult portrait work. It also involves composite layer work with no equivalent in standard portrait editing. We treat it as its own discipline, not a subset of beauty retouching.
You may also want to read: Maternity photo retouching — how to keep pregnancy portraits natural and beautiful